Making Meaning Matter

The Evergreen State College

Category: Blue Rabbit (Page 2 of 6)

Sarah’s Iteration IV


Sarah R. 12.2.2014

                “Where should we look for the no-thing? How will we find it? Surely to find something, we have to already know in a general way that it is there […..] Whatever we make of the no-thing, we do know it”….(Heidegger 189).

If the technology and a time when almost anyone can create anything is coming near, is it important, now more than ever, to attempt to create no-thing with that same technology? If nothing can’t or won’t exist, could the 3D printer, the total technological womb of object-ness, force it into existence? From the moment I asked myself this question I knew there would be no simple answer, no absolute right or wrong.  I knew the process of inquiry would be much more about the exploration of the material than the answer itself.

We could literally and casually, call any thing nothing if we wanted to. Things called in that way are the kind of “nothing” I chose to explore materially through 3D printed error, to arrive closer to the notion of the nothing of vastness, of silence, of total dark or total white. The point where inclusion and exclusion meet, bent like a circle.  I’ve realized no thing is vast, and that vastness is in nothing.

In the digital modeling environment of the CAL there have been an abundance of  varied objects, providing many examples of thing-ness, pushing me to think about what could possibly be called no thing.  As I mentioned in my CST post yesterday, the refinement of the program’s designs resulted in more and more refined glitches, producing objects that were very nearly recognizable as “something”. In looking so long at all of the 3D printed glitches I began pay most attention to the thing they all share, which is the space they hold.  It became clear to me that these objects needed space removed from the context of chaos and error. Through separation from the tangled mess of their shelf life, the pieces become unfamiliar but not completely foreign looking. In the photographs of the last iteration it was my aim to re-introduce these objects, allowing us all to become familiar by seeing them up close and still.

Writing about an engraving, in How Things Shape the Mind, Malafouris writes that although the engraved  shapes may be “‘formless’ that is not because they lack intent; it may be because their ‘intent’ is not about form but rather is about the forming process itself.” (Malafouris 193). The pieces I have been working with were formed unintentionally, formed with the presence of unintentional absence, and convey that mechanical process in their form very organically.  I came to realize that in order to accentuate the beautiful present absence of these pieces they would be best presented in the presence of absence.  And so, for this iteration I made a spatial installation. Sharing such a thing in the digital dimensionality of this screen lacks the materiality, embodiment and facilitation of space I have curated as an explanation of my exploration of no-thing. There is no way you can see the whole piece, when all you can see is this screen, so I will aim at conveying this work through the touch of the language of visual words.


I to the on white which is and
c s o t s s n
h u b h t e
o s j i r r a
s p e n i a t
e e c n i
n t g g
d s h
t


          P                                                                                                      E                                                                                                                                                                                                                   S

                                                                                                                                                                                          C

                                                             I

                                                                                                                                                                                                                                                                         E


 The string then meets each plastic piece and the line turns to static. Suspending the pieces in the air they become unfamiliar again, some are at eye level, some fall far below or above. The movement of walking by the threads causes them all to spin softly.  The dimension of the piece as a whole is roughly, 4 ft x 5 inches x 8 ft. In using all this thread, at points I felt as if I were sewing them somehow into space, sewing them together with cotton versions of themselves. The pieces are all just lines in the end, lines that are not unlike the lines of drawing, or writing, or the knots that the white thread would get into, except these lines are created in 3-dimensions by a machine, “externaliz[ing] nothing but the very process of externalization”. (Malafouris 193).

Ideally this piece would be in a space that was open on all sides so that the viewer could walk completely around it. When standing to face this curtain of sorts, I find myself confronted with a threshold between my self and the other side, although the threads pose no real barrier, the presence of such exists. In my mind’s eye the linear threads form a threshold between two dimensions and three, between digital and material, between you and me, and yet something as soft as breath can cause them to sway. The lines are wavering, this separation made by no-thing and nothing. For the time being they will continue to do so in front of my living room windows. Below are a few shots of the pieces suspended in air. 


Bibliography

Heidegger, Martin, and Thomas Sheehan. “What Is Metaphysics?” 1 Nov. 2013. Web. 2 Dec. 2014. <http://religiousstudies.stanford.edu/wp-content/uploads/1929-WHAT-IS-METAPHYSICS-2013-NOV.pdf>.

Malafouris, Lambros. How Things Shape the Mind: A Theory of Material Engagement. Cambridge: MIT, 2013. Print.

4th Iteration

				
     					window.onload = function() {
       						thingiurlbase = "http://blogs.evergreen.edu/spinaltap/wp-content/plugins/stl-viewer/js";
        					thingiview = new Thingiview("default");
        					thingiview.loadSTL("http://blogs.evergreen.edu/spinaltap/files/2014/12/amazing_wluff1.stl");
        					thingiview.setObjectColor('#2B56B8');
        					thingiview.setBackgroundColor('#FFFFFF');
        					thingiview.initScene();
      					}


Rotation: |


Right Piece Dimensions / X=28.86mm /Y=59.37mm/Z=29.47mm

Left Piece Dimensions / X=29.58mm /Y=59.42mm /Z=34.53mm

Peg Dimensions / X= 4.06mm /Y=4.06mm /Z= 13.18

Volume = 17 grams

Time took to print= 85 mins


For my project I have been working on building an artistic replica of the lumbar section of the human spine suffering from Spastic Cerebral Palsy. As I was researching what a section of spine looks like, I realized I did not just want to 3D scan a section of vertebra or just get a format for a vertebra off of Thing-a-verse. This is also when I realized that if I was going to draw and create this piece from my own designs it was going to be more of an artist’s interpretation than an anatomically perfect replica. This bottom to top approach to my project was an important decision for shaping my idea as a whole. I wanted to focus my project on the people and the idea and to me going through the whole process step by step allowed me to channel my thoughts and energies toward those goals rather than towards creating a perfect vertebra. Working with my own designs and learning how to do all the different things necessary to bring my pieces to life also meant that I got to learn more in general about the software, equipment, and nuances of 3D printing. Doing it myself, I felt that I was getting more out of the class and the whole experience and not cheating myself out of an opportunity to learn. The 3D modeling environment also had an effect on how my idea progressed. Seeing and testing out all of the different modeling tools meant that I could choose the best path for printing my vertebra in the style I intended. This meant taking my 2D sketches from different views of the same vertebra, and tracing them in Adobe Illustrator before transferring them into TinkerCAD. TinkerCAD made those sketches into block shapes, which I was able to use to sculpt a 3D artistic replica of a lumbar vertebra. My job didn’t end there. The physical restraints of the printer itself also took a toll on how I created my vertebra. My object as it stood posed some problems for the printer. There was not any flat surface to start the print job from so I had to find one in the shape. I achieved this by slicing my piece in half along its central axis so that I was left with two roughly symmetrical pieces each with its own smooth flat surface upon which to rest as they printed. Because of how long the printing process is for printing my vertebra, and because all of my peers also need to use the resources, I realized that it would be unreasonable to print another separate section of spine that is healthy to go along with my spine with C.P., as was my original plan. The next step is to assemble my spine from my printed pieces and some other materials I’ve collected. Using wire and a sculpted foam column to account for the soft tissue aspects of the spinal column my printed pieces will be mounted to display how they would look in life, in a person. I look forward to working on my project and sharing my progress and my idea as it evolves.

vinny_spine-1 vinny_spine-4vinny_spine-3

Yarden’s Sh-sh-shrine

window.onload = function() {
thingiurlbase = “http://blogs.evergreen.edu/yarden/wp-content/plugins/stl-viewer/js”;
thingiview = new Thingiview(“default”);
thingiview.loadSTL(“http://blogs.evergreen.edu/yarden/files/2014/12/design.stl”);
thingiview.setObjectColor(‘#4e41ff’);
thingiview.setBackgroundColor(‘#FFFFFF’);
thingiview.initScene();
}

Rotation: |

Dimensions:
141MM/180MM/70MM

Print time: 7hrs

I wanted to create a something that reminds us of our connection with the earth,  and that provides inspiration for an energetic practice like meditation, yoga, etc. My initial idea was to create terrariums, which brings nature into the home, but I wanted to take it further in the energetic practice aspect. After much thought and meditation, I realized what I wanted to create was a shrine. Shrines are  fascinating to me because they are an ancient symbol, and these symbols are some of the most sacred material things in existence to many people today.

Shrines are interesting because usually in shrines contain Gods, or Goddesses, or symbols to bow down to or worship. I wanted to create a shrine that simply reminds us of our connection with earth, and that emanates positive vibrations to inspire energy practice. In the lap of the figure, I will place some natural materials, like plants, or crystals, o maybe even a candle.

I have not printed it yet, but hope it will turn out beautiful!

Blue rabbit #4 – The Final Flute

 The Final Flute


photoflute

This is my prototype and model for how I built my flute. It is 5″ high and does work (though not well).


finalflutephoto1

finalflutephoto

Note the inner bore (diameter) difference. A flute needs to be tapered in order to create the proper amount of back pressure.

The Flute In Numbers

20.12mm – 20.12mm – 253.9mm

24 grams

3.5 hours

$1.95

As excited as I have been to print my flute, one of my favorite moments came as I added it to the que the day before it was due to be printed.  The above numbers, which represent the dimensions, weight, time and cost of the print, speak to the ease and affordability of printing an instrument.  The numbers, especially the cost, were a mystery to me before, or rather, I never really sought to find out the exact cost of my object.  $1.95 (not including the $2199 price tag of the printer!) is all it costs for one flute.  An instrument that can shape peoples lives through art and expression.

My experience with the digital interface (mostly Tinkercad) was fairly good as far as the design aspect is concerned.  Designing the dimensions were straight forward, I used my model as well as certain ratios to decide where to place the holes, as well as determining their shape and angle.  Towards the end of the design, I realized that the inner diameter, or bore, of my flute was consistent all the way through.  The problem here is that the air would flow through at too quick a rate to make much sound.  As you can see in the above photo (prototype/model), the entire shape of the flute is tapered from the hole in which you blow, the embouchure hole, towards the open end at the bottom.  This allows for more air to come through the holes above, making for greater playability when fingering notes.  I had to make several versions of flute ends as well as elongated cones to make the bore taper to a smaller output.

As of now, I have yet to combine the pieces, or blow into it for that matter.  I’m waiting to have it glued and completed before giving it a first go.  I’m hopeful. . .

BR4 – As Long As I’m Learning…


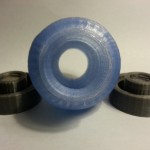
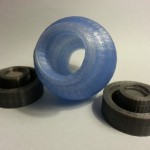
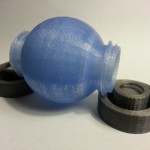
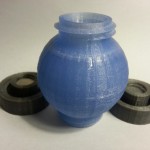
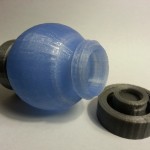
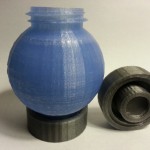
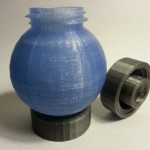
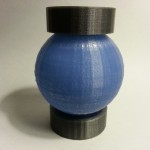
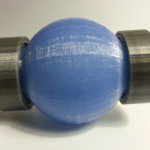
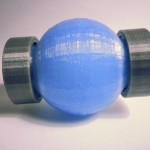
Parameters Globe: x = 65 mm, y = 65 mm, z = 78 mm Caps: x = 46 mm, y = 46 mm, z = 15 mm Overall Height: 86 mm Material Use: 50 grams (Globe) + [17 grams (Caps) X 2] = 84 grams Print Time: 210 mins (Globe) + [75 mins (Caps) X 2] = 360 mins = 6 hours

20141201_205826
20141201_205716
20141201_205657
20141201_205740
20141201_205530
20141201_205108
20141201_204928
20141201_205335
20141201_210212
20141201_210454
20141201_210337
20141201_210429

My original question: Can a 3D printed object be responsive to its environment and to the dynamic energies of the people and processes that interact with it?

My double sided snow globe is a spherical globe with two ends fitted with threaded caps designed to hold magnets inside the inverted basins. The original intent was to fill the globe with water along with ferrofluid, a fluid that becomes magnetized in the presence of a magnetic field. The theory was that the ferrofluid would become magnetized by the magnets placed inside the basins of the caps, making visible the magnetic field.

The current form of my idea is not yet represented in 3D. What started out as a simple sphere to demonstrate a simple magnetic field may turn into a slightly more complicated object to demonstrate the magnetic field created by an electromagnet. In its current state the ferrofluid simply becomes magnetized to the magnets, which does not demonstrate the responsiveness I desire.

Although, I was able to easily manipulate my objects in the digital modeling environment to fit the progression of my idea, its only influence was to execute the idea as it progressed through my trial and error testing of the actual fluids and magnets that will eventually inhabit the globe. Currently, the globe itself has escaped any iterations; the caps have been redesigned a few times already. However, the ease with which I am able to quickly manipulate the design makes the actual testing of the fluids and magnets less intimidating. I have become more willing to alter my design knowing the ease with which it can be done, without getting discouraged with the multiple iterations through which it has gone.

The only technical constraints of the 3D printing process that affected the progress of my idea were the limitations of the actual printing of the globe and caps. Although, 3D printing makes easier the prototyping process, the limited availability of the printers, the troubleshooting of the various filaments, as well as the printer and software, made the printing process less accessible than the modeling environment. In addition, when the globe and caps were finally printed, it took some manual convincing to make my amateur thread design meet my high expectations.

As it currently sits on my desk, my double sided snow globe could be used as a container for various purposes (with the exception of holding an actual liquid). However, whether accomplished inside the next week or not, I intend to complete my investigation of electromagnetic fields and whether I will be able to create a 3D printed object to make visible the invisible. My intention is to continue to experiment with making an electromagnetic field until either a) I do or, b) my frustration leads me to finally take a class to learn about the incredibly complicated physics and mathematics involved in creating exactly the field I want. Regardless of the outcome, I’m feeling accomplished at what I’ve learned thus far and excited to learn more.

steph smith, blue rabbit, 4

R.C. 1,2,3

R.C. 1,2,3

OBJECT :: object

object(n):

†b. The presentation of something to the eye or perception.
a. A goal, purpose, or aim; the end to which effort is directed; the thing sought, aimed at, or striven for.
5. Philos. A thing which is perceived, thought of, known, etc.; spec. a thing which is external to or distinct from the apprehending mind, subject, or self.
7. Computing. A distinct (or discrete) entity, as (a) a package of information (as a data structure definition) together with a description of its manipulation
9. Something put in the way; an interruption or obstruction; an obstacle, a hindrance.

object(v):

I. To oppose or disapprove.
8. trans. To expose (a person) to or against danger, evil, etc.
a. To put or place (a person or thing) so that it abuts, meets, or intercepts something, or so that it is exposed or subjected to a material object, physical phenomenon, etc.

When asked what place my project holds through the narrative of evolution, I am reminded of something I recently read in a Jean Baudrillard book:

“(Man) is the absolute horizon of evolution, since he is the destroyer of the cycle.”

(Fragments, p.7)

In evolution, new design blossoms and extinguishes the obsolete; evolution occurs through creation and destruction. My Blue Rabbit work attempts to do both (to create/and destruct) simultaneously.

Through the creation [part of me prefers the word “assembly”] of a simple accessory, I hope to participate in a process of de(con)struction. As an artist working in response to surveillance, I am looking to loosen (or entirely disband):

fixed notions of identity

unconsented visibility

our burgeoning police-state

the racialization of suspicion

and

our increasing inability to access that which is collected from us/about us. (meta-data, communication details, biometric information)

Destruction, or the re-working of the “legible” visage is a potent method of engagement with surveillance, as it moves to shift the existing relationship between self and state/private power.

code

code

switch

switch

Logistics:

My original vision was to develop a series of wearables, operating within the theme of radical camouflage. Once I began prototyping, I realized the time required to “make” (model, print, assemble, test, re-design, ad infinitum) mandated that I constrain my idea to a single design.

The design I chose to explore is one that addresses the lived experience of code-switching.

Code-switching is a process of adapting oneself (typically through manner of speech) according to one’s environment. Those who must adapt most often and most discretely are those who inhabit the margins of the dominant culture (race, class, sexuality, and gender all play important roles in this). Code-switching is about safety and survival.

Extrapolating this process into a functional art object:

In a non-threatening environment, my object can be worn around the neck.

In a suspect environment (one in which a person feels they need to hide), the object can be adjusted and worn over the face obscuring the brow and rendering the wearer “unreadable”.

I wanted this transition, this response to a shift from SAFE to SUSPECT, to be enacted through a singular gesture.

The future of my object lies in a further exploration of the themes of surveillance, intimacy, gesture and intervention.

– I want to probe the surfaces and experience of “that gesture” (the swift move from suspicion to protection). I want to distil it into an acute study of a single motion (an arm reaching from chest to brow), and sift out what affective meanings it holds.

– I have been trying to sort out how to “make contact” with my data double. How can she speak alone and how can we speak together? What sort of relationship do we/can we have?

– I want to continue making radical camouflage, focusing on designs that can “pass” in variant situations without calling attention to the wearer. I intend to introduce different mediums into this work, including textiles, metalwork, and language arts.


I believe the fate of my object is less important than what paths of inquiry have branched out from it.


Rotation: |

x= 150 mm
y= 130 mm
z= 2 mm

Making Seeing Matter Iteration #4

ray ban glasses

Rayban printable paper sunglasses cutout

When I first approached my project I started out using tinkerCAD blind. I drew two half circles and cut some eye holes out of them and pressed print. Needless to say they did not look good on anyone’s face. I worked for awhile on tinkerCAD struggling with the limitations of an additive-subtractive polygon based sculpt tool, glasses need clean curves and delicate lines in order for them to not be cumbersome on the face. My glasses started looking much more professional once we learned adobe illustrator, and the best moment was when I found Rayban cut out paper sunglasses online so that I could completely copy the shape of the frames on adobe illustrator and put the .svg into tinkerCAD. My hope was to use 123D design to fillet the corners of the glasses, making them more of a curved shape than square frames but something about my file made it not work on 123D design. The most challenging part of creating glasses using a digital modeling platform was how hard it was for me to create good looking curves. No matter what software I used it was always challenging for me to create sleek looking glasses, which is in part why I think glasses look so blocky and square on the downloadable pairs from thingiverse. If I had more time with the project I would want to troubleshoot some of the problems that I have had with my model, creating glasses that function and can be downloaded and used is a really powerful thing. My hopes for my project are simple, I want to print out my last iteration of my glasses, and once I confirm that they will print I will upload my design to thingiverse so that anyone can use and improve upon my model.

Model: 7g Print time:~35 min  FRAMES X:26.92mm Y:87.25mm Z:5mm ARM X:20mm Y:81.50 Z:5mm

				
     					window.onload = function() {
       						thingiurlbase = "http://blogs.evergreen.edu/emmaelvis/wp-content/plugins/stl-viewer/js";
        					thingiview = new Thingiview("default");
        					thingiview.loadSTL("http://blogs.evergreen.edu/emmaelvis/files/2014/12/bodacious_trug-fyyran.stl");
        					thingiview.setObjectColor('#2B56B8');
        					thingiview.setBackgroundColor('#FFFFFF');
        					thingiview.initScene();
      					}


Rotation: |

Blue Rabbit Project – Iteration 4 Otis

2.5″ x 2.5″ x 2.5″ Time: 4 Hours. Weight: 61 Grams. Unfortunately, the virtual model is only a small part of the project as a whole, and the rest will only be ready after the object has been printed (or misprinted). The model is made up of layers of unprintable overhangs, which when printed will […]

Iteration #4 Cannibalism in 3D


Rotation: |

Dimensions: 35mm, 68mm and 83mm Print Time: 55 Minutes Material Use: About 11g I decided to design an object that I believe is representative of my Grandfather and his battle with prostate cancer.  My idea was to originally create many edible objects that I would design to represent a person and then watch them basically eat themselves.  This idea I learned early on would be an ambitious one, still I decided to run with it.  I wanted to print something that got rid of the plastic altogether and also something that would be fun and exciting to hold and eat.  The only physical part of my project that I can show anyone are the pieces of an unfinished extruder, which I didn’t design.  The extruder was really the only thing that could have made my project work, and due to the time constraint I wasn’t able to print and assemble all pieces successfully.  I’ve learned much about the actual printer, and it’s capabilities and how error is more common than success.  Without already having a 3D printer that could actually print food I was forced to find an alternative, one that unfortunately didn’t reach success.  With the time constraint, and everyone else printing objects and the parts of my extruder failing, by the time I publish this post there will not be a complete, physical and edible object for anyone to eat.  The fate of this object, is that it will probably be printed in plastic, and I will still give it to my Grandfather.  My initial interest in printing food was that I would give it to people as a gift, and study the importance behind gift giving.  Then it turned into me not wanting to use plastic which is ultimately the only thing I used.  Overall I’m happy with what I chose to do this quarter, sure the execution is a bit off and there is a lot missing but overall I really enjoyed the research I found.  There is actually a market for printing food, it’s slowly emerging and finding a market, pretty soon there will be a real life Willy Wonka.

The Tooth-Pick: BR4


Rotation: |

Dimensions: 30mm x 26mm x .8mm

mr_mmm_images-00058 mr_pick

This is the Tooth-Pick.  The name “Tooth-Pick” came to me suddenly while thinking of how it looks and how it also relates to the style of crazy guitarists (Jimi Hendrix)  using their teeth as picks.  I really enjoy this sound on my acoustic projects now, but want to get it printed in nylon instead of PLA as nylon is more flexible and doesn’t break so easily.  The idea of the project has always remained the same, but as time progressed and many hours of testing ensued, the design and name became realized.

I jammed with Cooper and asked him about his finger-style guitar playing, and he told me how he really likes to feel the connection of the strings to his actual hand instead of having a mediator between them.  I then proceeded to play without picks a lot and for a moment thought the whole idea of plectrums was outdated.  But when I decided to cover Foxy Lady by Jimi Hendrix, I realized that to get the twang and bite on the guitar I needed a pick.  So this project has really challenged my sound and brought me to realize both polarities to the plectrum question and now I hold both polarities and realize that “There is a time and place for everything under the sun” -Solomon.


Quidam

Quidam

Cameron Ball

Every verbal utterance put forth has both an addresser and addressee.

// 

Rotation: |

X: 178.79

Y: 128.92

Z: 54.10

Print time: 6 hours

Traditionally, language allows us the opportunity to transmit knowledge(Ex: “Meet me after class at Red Square.”) or perform social tasks(Ex: “Thanks, bus driver!”). In both these instances, the addresser and addressee are meant to comprehend each other.

Com(together)/ Prehendere(to catch hold of)

If we were not able to comprehend each other through language, we would arguably not have developed it as a tool. However, we have readily utilized the power of language and its ability to help transmit meaning. Why then, do I feel the need to use the only system of meaning I know in order to create Zaum, beyond meaning? Why do I want to bewilder myself and my audience rather than make it comprehensive?

The lexical framework we use to communicate obeys a deliberately created, confining structure, and does not allow linguistic expression to arise freely. My desire to go beyond meaning stems from a strange nostalgia of the time before I knew words, mixed with a yearning to finally understand how to use language to represent, rather than misrepresent.

Printing poetry was an intense creative process. I went through countless iterations on paper, trying only to decide how to arrange the words 3 dimensionally, not to mention pages upon pages of rejected words. I had wanted to create a mechanism of language, something that generated combinations of words, with my own freely expressive twist. I envisioned a Rube Goldberg poetry machine with shifting sets of type and gears and complication all just to perform a seemingly banal task.


I just did not know how to use the space. I have enough trouble writing on a 2d surface, that when I added another dimension, I really got afraid of the workplane.I jumped from program to program trying to create fonts, getting stuck when I realized I didn’t have the time and expertise to create a font

.Untitled


2Untitled

I spent hours trying to get this one to work….

The result was that I would start using exclusively Tinkercad, shamelessly using the text tool again and again without bringing much variety of custom text into it. It seemed a little sterile, using the prefabricated fonts, but when I tried sculpting individual letters on Adobe Illustrator or Tinkercad, I was glad to have the option to do prefab fonts. The worry of creating a font and doing something groundbreaking with typography was really getting in the way of my creativity. My main challenge was that my entire project has been focused so broadly and on so many facets of experimentation and exploration of language that it is hard to decide which language game to play.

However, I created something that I think will allow me to keep experimenting with the questions I posed throughout this project. The final result is a sculpture, a poem, a scene. I haven’t seen it as an actual object yet, but it is already reminding me of authors to put it into conversation with.

A technical constraint I felt hindered my creation was that I originally planned to create the poem and structure/3d model, and then tweak the lettering so that it looked more similar to one of my inspirations.

TangoInner


This is “Tango with Cows”, a hundred-year-old experimental text by Vasily Kamensky.

I had originally wanted to combine typographic experimentation of a similar vein to this with the idea of a Rube Goldberg language machine, but I was having a lot of trouble getting right effect with the juxtaposition of fonts. My main problem was that I had too many metaphors for what I was trying to do: hypnogonic hallucinations, Kristeva’s “Semiotic,” Barth’s cosmopsis to a lesser extent, Rube Goldberg Language machine, and “Tango with Cows” will not all fit into one poem.


bella'smakingportfolio 2014-12-02 11:37:33


Rotation: |

Blue Rabbit Iteration #4 – Austin Roberts


Rotation: |

How the different objects were arranged for printing.

How the objects were arranged and oriented for printing.

it4image

Material Use: About 8g (0.02lb)

Print Time: About 45 minutes

117 layers

Dimensions:

  • x- 51.6mm
  • y- 35.91mm
  • x- 22.51mm

I didn’t start out this project with an idea of what specifically I was going to print.  MY idea only calls for an object that is meaningful to me.  On Monday of week 8 I was exploring in TinkerCad and decided to see what would happen if I used the cookie cutter technique we used to make the french table leg, but with words instead of the shape of the table leg.  What this produced were objects that on one side show a letter, and have a different letter on a different side.  The result of this experiment is my final printed object.  Almost immediately after creating these letter object some of my classmates came over and asked me what I made and how I made it.  This accidental creation received awesome reactions that day, but the conversation I has with Katie about it stands out to me.  Katie was so excited about my discover and all of its possibilities.  I was struggling to decide what to print, but when I thought of my conversation with Katie, I felt good.  I realized that these letters fit the needs for my project perfectly.  These letters have no obvious use or purpose, but are meaningful to me.  Of course, in my conversation with Katie she suggested that I could turn these letters into a word puzzle, giving them a use.  I have discovered though that it would be impossible to create a useless object, at least for the purpose of this project.  If I create something to use for my project, it is useful.  When I think of my letters, I feel good.  They have meaning to me.  Another aspect I had been thinking about was trying to create an object that is meaningful to only me.  I think this might be impossible as well, unless only I know of the object.

At first once I had settled on this idea, I thought I would print a set of letters that spelled my name from one side, but all had the letter A on the other.  This turned out to not be as easy as I thought because one of the letter combinations seems to be impossible to print on a Makerbot without supports, at least working with the limitations of Tinkercad.  This wasn’t a problem for very long because I quickly decided to instead print a set of letters that from one side reads my first name, and from the other side my last name.  The only problem I ran into with this design was that my last name is one letter longer than my first name, so I had to add my middle initial to the end of my first name to make it even.  From there, I only had to turn some of the letter combos on their sides or upside down to ensure proper printing.

(Iteration #4 Devin Bender)


Rotation: |

Graham Iteration #4


Rotation: |

177 mm long

127 mm wide

63 mm tall

170 g

8.5 hour print time

photo 2

photo 1

Zev’s Blue Rabbit Project (Iteration #4: Model)


Rotation: |

Chuck – STL Iteration


Rotation: |


The Astrolabe took 3.5 hours to print and used 56 grams of material.

The Astrolabe took 3.5 hours to print and used 56 grams of material.


steph smith, blue rabbit, object

R.C. 1,2,3

R.C. 1,2,3

OBJECT(noun)

::

OBJECT(verb

object(n):

†b. The presentation of something to the eye or perception.
a. A goal, purpose, or aim; the end to which effort is directed; the thing sought, aimed at, or striven for.
5. Philos. A thing which is perceived, thought of, known, etc.; spec. a thing which is external to or distinct from the apprehending mind, subject, or self.
7. Computing. A distinct (or discrete) entity, as (a) a package of information (as a data structure definition) together with a description of its manipulation
9. Something put in the way; an interruption or obstruction; an obstacle, a hindrance.

object(v):

I. To oppose or disapprove.
8. trans. To expose (a person) to or against danger, evil, etc.
a. To put or place (a person or thing) so that it abuts, meets, or intercepts something, or so that it is exposed or subjected to a material object, physical phenomenon, etc.

When asked what place my project holds through the narrative of evolution, I am reminded of something I read in a Jean Baudrillard book:

“(Man) is the absolute horizon of evolution, since he is the destroyer of the cycle.”

(Fragments, p.7)

In evolution, new design blossoms while the obsolete is diminished; it takes place through both creation and destruction. My Blue Rabbit work attempts to do this simultaneously.

Through the creation [part of me prefers the word “assembly”] of a simple accessory, I hope to participate in a process of de(con)struction. As an artist working in response to surveillance, I am looking to loosen (or entirely disband):

fixed notions of identity

unconsented visibility

our burgeoning police-state

the racialization of suspicion

and our increasing inability to access that which is collected from us/about us (meta-data, communication details, biometric information)

Destruction, or re-working of the “legible” visage is a potent method of engagement with the current relationship between self and state/private power.

code

code

switch

switch


Logistics:

My original vision was to develop a series of wearables. Once I began prototyping, I realized the time required to “make” (modeling, printing, assembly, testing, re-designing, ad infinitum) mandated that I constrain my idea to a single design.

The design I chose to explore is one that addresses the lived experience of code-switching.

Code-switching is a process of adapting oneself (typically in manner of speech) according to one’s environment. Those who must adapt most often and most discretely are those who inhabit the margins of the dominant culture (race, class, sexuality all play important roles in this). Code-switching is about safety and survival.

Extrapolating this process into a functional art object:

In a non-threatening environment, my object can be worn around the neck.

In a suspect environment (one in which a person feels they need to hide), the object can be adjusted and worn over the face obscuring the brow and rendering the wearer “unreadable”.

I wanted this transition, in response to a shift from SAFE to SUSPECT, to be enacted through a singular gesture.

The future of my object lies in a further exploration of the themes of surveillance, intimacy, gesture and intervention.

– I want to explore the surfaces and experience of “that gesture” (the swift move from suspicion to protection). I want to distil it into an acute study of an arm reaching from chest to brow, and what affective experiences occur in it.

– I have been trying to sort out how to “make contact” with my data double. How can she speak alone and how can we speak together? What sort of relationship do we/can we have?

– I want to continue making radical camouflage, focusing on designs that can “pass” in variant situations without calling attention to the wearer. I intend to introduce different mediums into this work, including textiles, metalwork, and language arts.


I believe the fate of my object is less important than what its process of creation has “started”.


Rotation: |

x= 150 mm y= 130 mm z= 2 mm


STL Iteration


Rotation: |


This is a cube with the code to create a cube etched into it.  A cube inside of a cube.

BLUE RABBIT ITERATION 4

This quarter we have been answering the question of “in a world full of too much crap what is an idea worth materializing?” by using 3d printers to explore materiality and design. My interest in materiality stems from Muñoz’s theory that “Both the ornamental and the quotidian can contain a map of the utopia that is queerness”, and that these blueprints of futurity pose alternatives outside the here and now, ours being a here-and-now of rampant pollution and overproduction, which upholds my theory of what I am referring to as “the post apocalyptic horizon” in which we currently operate. I intended on producing fabric in the vein of chainmail that could be added and subtracted as based on the users needs. This fabric is attempting to amend the issue that clothing becomes un-wearable once we grow out of it, seeing that clothing is deemed garbage once it runs out of season, and is dumped.

window.onload = function() {
thingiurlbase = “http://blogs.evergreen.edu/danielloosemmmblog/wp-content/plugins/stl-viewer/js”;
thingiview = new Thingiview(“default”);
thingiview.loadSTL(“http://blogs.evergreen.edu/danielloosemmmblog/files/2014/12/danielloosechainmail-2.stl”);
thingiview.setObjectColor(‘#2b56b8’);
thingiview.setBackgroundColor(‘#f8f8f8’);
thingiview.initScene();
}

Rotation: |

The design for this fabric allows open rings to easily slip into each other forming links, but not slip out thus allowing the pieces to be built on easily over time. The pieces can also be removed with relative ease as well. In order to print chain mail the rings must be tilted at 45% and staggered, with the bottom removed. The fabric can be printed without a raft, but has more success with one, the only issue is removing the rings from the raft without breaking them.
My Chainmail In The Virtual

This idea of a growable fabric reinforces the idea of the ornament of the garment, specifically the ornament of armory being one with the user and is in tandem with the work of queer designers working in the realm of aestheticizing the post apocalypse (click here for a vfile of visual examples). I came into this project knowing that I was going to produce an item that could be utilized by a loved one, in this instance, my best friend Kat. Kat is about to begin her transition and trans women have an average lifespan of 30-32 years old purely due to hate violence, are 20% more likely to be assaulted and are 16 times as likely to be murdered. These statistics are very upsetting to hear and more upsetting to experience. I am giving my friend customizable chain mail armor in the form of a bra, an object that I hope will grow with her in tandem as her breasts develop more during hormone treatments and as conceptual armor for gracing the world in the apocalyptic horizon.

Thomas Bouwer Blue Rabbit Iteration #4 (Actual physical Rubber [plastic] Duck)


Rotation: |

Dimensions: 60.00mm wide, 62.47mm high, 80.07mm deep

I’ve done it. I have modeled and 3-D printed a duck. What does this mean for the incredibly important world of Rubber Ducks? Actually, it doesn’t mean that much.

The question we were given at the start of the quarter was “In a world full of too much stuff, what is worth 3D printing?”. I then took this question and decided to explore Rubber Ducks. Through my research, I have realized that rubber ducks exist pretty much purely for marketing purposes. Side effects of this marketing include a fun way to solve problems¹, and a detrimental effect on the environment². In other words, Rubber Ducks do more harm than good. I mean, it’s not a lot of harm, but the harm exists.

So, they’re pointless. What does that mean about 3D printing? How has it improved Ducks? It hasn’t improved them, as much as it has changed them. Part of the fun of actual Rubber Ducks is that they’re smooth and children can play with them. The design I’ve made is rough, the bill has sharp edges. On the plus side, they aren’t as harmful to the environment. However, their harm is not gone. PLA isn’t completely biodegradable,  which means that printed ducks will still be around for a long time, messing with the world. The only pure improvement with the printed ducks over the regular “traditional” rubber duck is that they aren’t being mass-produced and can’t be marketed as effectively. The printed ducks aren’t better. They’re just different. In some cases, they’re different in subtle ways, and others are drastic.

image1

I was having this quandary before I printed my duck. I didn’t think, based on my research and progress with my model, that 3D printing would affect Rubber Ducks. I remembered, however, that maybe the best thing that Rubber Ducks have going for them is their position as symbols of nostalgia and innocence. They’re funny. They’re cute. The only reason you are reading this, I’d wager, is because you were curious what the hell could possibly come from 3D printing rubber ducks, as did I. Now, having printed a Duck, I have an answer: Nothing. No great revelation has revealed itself to me. No fantastic new utilization has presented itself, for which, Rubber Ducks are perfect. No unfathomable problem is being pondered that could be answered if the person pondering it were to simply look at rubber ducks a little differently. 3D printing has barely changed this at all, simply shifting the environmental destruction from corporations and factories, to people with 3D printers.

“In a world full of too much stuff, what is worth 3D printing?”

I would like to present an answer, though not the answer I expected to give or the answer anybody expect to receive.

Not Rubber Ducks.


¹Rubber Duck debugging, which I have written about several times in other posts.

²I wrote about this in the “Photos” post.


Week 9: Iteration #4: The Blue Rabbit In Material Form -Shaye Riano 12/2/2014

Only an individual knows their own true path, many are trapped and haven’t found it. I get individual satisfaction that is earned, deserved,  and fair trade out of helping people understand and be conscious of the realities around them, in whichever way works the best. Because of who I am, I asked a question at the beginning of my academic career at Evergreen. Below is my question and a 3D model product that I made through my learning process, and will print into physical being. The hand is my own, I am my own, yet we are all one. Whatever you put into something is what you get out, the meaning behind art (Art- To artificer -One who invents or crafts), is the physical energy, or matter, that you put into it, and art is everything we make.

“what is the potential of 3D printing in the healthcare industry, and how will it revolutionize the medical field?”


Rotation: |

As I have been exploring this question and its relation to my experimentation and learning regarding 3D imaging, modeling, and printing over the past nine weeks I have come to the simple yet truthful conclusion that the potential of 3D printing, and human ingenuity portrayed through tools and technology… is infinite. I think 3D modeling, printing, scanning, and downloading is going to revolutionize every industry and field on the planet, just like the internet did.

As an individual that always wants to be the best, and make the least amount of mistakes, I understand that if you get stronger, there will be someone who can hit harder. If you build more protective armor, people will develop more destructive weapons. It is the human condition to suffer, but this is the greatest joy of all, because without suffering there cannot be pleasure. All the word “Work” “means”, is materialistically wanting something enough to exert the 3rd dimensional energy required to get it in this reality.

But every individual person is incredibly complex and different in regards to body, soul, and mind that standardization doesn’t work for any period of time. We, as a collective conscious are evolving faster and faster. As we make exponentially make more and more, the meaning is making us in return. In today’s capitalist society, this means efficiency and effectiveness at doing what humans do… create, make, and engineer art is at an all time high. But change is inevitable, the next big turning point is at hand. As multi-dimensional being we are in the process of mastering the 3rd dimension, material reality. 3D printers are the future of this time. But why? What does it all mean? My mind cant help but grasp at the “biggest picture.” In this material reality my body is a powerful and effective/efficient machine, but it is addicted to material. Will I grow tired of filling the suffering hole with things. After all, it only gets so good, there has to be equal, fair trade. Sometimes my mind feels trapped in this dimension, screaming to have its full potential unleashed, will we find out how? Is perfect quantifiable? Or is change the only consistent. In this material world we are all individual parts of one infinitely reflecting, and incomprehensibly diverse, greater consciousness moving through space and time. I think the answer is to stop enslaving and taking advantage of other humans, so that every one can see this truth and understand that there is nothing more powerful than willingly sharing and accepting. Even though there are infinite faces in this 3 dimensional reality where the triangle reigns supreme, being able to change and work together takes energy. But if we could all see each others points of view, we could all look in one direction and have the most powerful gaze of all. We are visual creatures, the eyes are a doorway to the mind.

In this life, if we could openly accept and share with one another, every individual would have every thing. I believe this major shift or evolutionary leap in consciousness could happen in my lifetime. If and or when, our minds develop machines that are as capable as human beings, what will happen? I believe we can evolve technology enough to where no-one will need any-thing through 3D printing/Bio-engineering and robotics/programming/machinery, material needs will be obsolete. Potentially we will move on to master the 4th dimension of time, or other undiscovered dimensions. It is on our doorstep, the 3D printer is the womb of the machine, machines are making machines. We can talk to machines, and machines can talk to us and each other through markup language (Text based code) as well as visual, and eventually potentially every other sensory adaptation of the human body. People were developed by nature, we use our own nature and designs found in the nature around us, the nature we create, to make new nature. Therefore perpetuating this infinite cycle or circle of change, but to make something there must be an equal unmaking for the karma of the universe to stay in balance, everything is balancing on a spectrum, or several, depending on which dimension you are talking about. Change is hard work, and work takes time, something that is limited in this cycle of life, or manifestation of reality. I am learning to embrace this, and make as many mistakes as quickly as possible, because that’s how you learn the fastest, which is the opposite of what our society teaches us.


Click here to view the embedded video.

Blue Rabbit Project: Iteration Four

Chrissy G.
Week 9
// 3D Printed Object //


Rotation: |

When I initially began this project, I chose to render a 3D model of the yurt that I live in for a very simple reason: I wanted to learn how to build it. Yurts are traditionally very simple structures; they’re compact, lightweight, and easily assembled. Designing a yurt in Tinkered was surprisingly a lot like constructing one in real life. They are comprised of khana (the lattice walls), rafters, a roof ring,  a door frame, and a base. These main components are geometric, symmetrical, and straightforward. I wanted the model to be as close to home (so to speak) as possible.

yurt_diagram-1


However, some obstacles presented themselves in the process. One thing became clear after my fourth attempt at printing the model: I needed some basic architectural design elements integrated into the construction process. I wasn’t just printing a model to see if it works– I was reproducing something that actually works.  But it wasn’t working. The middle of the “X” in the latticework (where it would be bolted in real-life) was too thin to print. One theory is that because the “X” is a flat shape, curving it around and shaving off the edges (to make a circle) would compromise the structural integrity of lattice. In real-life, the “X” shape creates a tension around the circumference that enhances its stability, but virtually, it does the opposite.

The next move (with the help of John) was taking the too-thin lattice into Blender and simply thickening it up. Seems simple enough, right? I took the new, sturdier model into Tinkercad and discovered I couldn’t manipulate it at all. New shapes wouldn’t group to the knaha, including the rafters and door frame.

Screen Shot 2014-12-01 at 10.07.02 PM

The lattice ended up becoming too complex of a structure to even download into Makerware. The model (unbeknownst to me) had about 55,000 faces, all of which the 3D printer would have to identify and print.

Screen Shot 2014-12-01 at 10.08.06 PM


The result was a clashing of technologies. The logic of thousand year-old architecture transcribed into the language of 1′s and 0′s made something simple into something very, very complicated. My attempts at making a realistic model of a yurt subsided. I needed to match the language of the computer to be able to print the yurt, which meant changing (and ultra-simplifying) the design.

Screen Shot 2014-12-01 at 10.46.19 PM

My original idea to “print space” in order to understand the concept of home has very much been gratified through the complications of this project. No living spaces come without time and maintenance.  These learning curves have given me an aerial perspective on the difficulties of designing custom domestic spaces, whether it be tangible, physical, or virtual labor. Printed space, therefore, can be represented as the gaps between the building and the builder.

I’m still curious if 3D printing can inform the homes of the future. I wonder if we will be able to perfect the nests that match our personal, aesthetic, and economical needs. If technology can customize living spaces, then who is it that customizes the human experience? How much human touch is necessary to make a living space truly livable?


Blue Rabbit Iteration #4

The pen that I have printed out fits into my original idea of making a tool that you needed just as it did before except maybe more so because now with the tools I have here at evergreen I will be able to decorate it and have it be or have it be printed with inspirational words or illustrations on the side which will add personal value to it. Also I am working on shaping the pen so that it fits my hand and my writing style more easily. The digital modeling environment shaped my idea in the sense that the pen was originally a little larger then I had intended and it was a little bit off on the measurements but after working on it enough I have been able to perfect the measurements of the pen and also reduce its size to a reasonable volume. The technical constraints have definitely affected the mechanics of my pen because the type of plastic that they use in 3d printing is not the type of plastic that is used to make some of the pen components which leads to a brittle mechanism. What I mean by this is that the way that it is currently built there is a chance that a small part inside the pen will break and need to be replaced every couple of weeks of using the pen. However with a little tweaking I think that it is possible to fix this problem without having to print with some other plastic. The fate of the 3D printed pen I personally think is a bright one. If some of the technical problems surrounding the 3D pen can be overcome then I plan on using it for as long as possible. Assuming that I continue to have access to a 3D printer and can continue to print out new parts and updated designs I don’t see when a 3D printed pen will outlive its usefulness. Furthermore I am contemplating putting the rough designs onto thingiverse so that people will be able create their own pens that they can customize to their own style and their own preferred way of holding the writing.


Dimensions

Pen Clicking Mechanism
X 16.10 mm 7 mm
Y 14.86 mm 10.30 mm
Z 134.59 mm 53 mm


Volume and Printing Time

Pen Clicking Mechanism
Volume 9 grams 1 gram
Printing 1 hour and 30 minutes 45 minutes


Rotation: |

Iteration December 1st Blue Rabbit

photo

Glasses Frames H: 2.5 inches L: 6.14 inches Ear Rods: H: 0.6 inches L: 5.3 inches

I have yet to print my project, but am greatly excited about the progress that I’ve made, and the things that I have learned. I feel capable to freely print anything I might desire in 3D, granted there is a purpose for it. The glasses frames that I’ve designed will be utilized and I will perfect them until they make me feel they are done.

Having glasses frames as my project is empowering because I feel like I have total control on what I want them to look like. If I see something I don’t like in the frames that I’ve printed, I can easily come back to Tinkercad and fix whatever I found that didn’t work well. If I want a different color of frames, I could go and do that with a couple of clicks.

Although Tinkercad is a great resource, I find it slightly grim with the shapes that you can use. If I could have designed my own shapes, I feel I could’ve made my frames much more personal, and shape them how I felt suited best, without having to work around different constraints. Alas, my project will survive, and will turn out just fine for my first try, I believe.

I’ve learned that glasses frames can be a great resource for changing your mindset. If you’re sad, put on a pair of bright red funky glasses, go big or go home. If you’re feeling shy, slap on your nerdy black glasses. Researching this topic has taught me many things about people and why they choose to wear the frames they do.

I’m excited to keep advancing in the things that I’m doing, and hopefully have little errors in able to ensure that I waste as little PLA as possible.


Iteration #4 PEteR

PTRS KNF

The printed artifact of my dream as it exists now is mildly different from the original aesthetic I was trying to achieve, however it still is relevant to the pre-conceived concept behind its creation. Tinkercad provides a versatile bank of geometric shapes and symbols that equip any desired design with an easily workable base for further construction and manipulation. During the beginning constructive practice of my object, the “Plumbing Knife” I anticipated a fairly easy process of replicating its subconscious design with Tinkercad. The overall simplistic visualization of the knife inquired a physical makeup of a smooth flat black handle without a hand guard about 5 inches long. The blade itself was about 3 inches in length and dotted with segments of rust. This design however, was not entirely attainable through the operational steps of Tinkercad regardless of how basic and symmetrical the knife was upon its conception. Only a few particular Shapes made available with the use of Tinkercad helped me construct the beginning stages of my design, particularly the half cylinder and cube which were used in the handle of the knife to add more width and dimension. Large cubes were also included to acquire negative space for evening out and cutting the object down in a symmetrical fashion. The finished design of the knife is now about 7 inches in length to accommodate the exact gripping width of my own hand.

X Axis: 22.60 mm

Y Axis: 177.00 mm

Z Axis: 12.00 mm

Adobe illustrator was critical to the knife’s further manipulation and development after adding as much as I could with tinkercad. With Illustrator, I was able to use the line and pencil tools to create precision curves and symmetry necessary for establishing the subtle grooves of the knife’s handle. The ability to interface Illustrator with Tinkercad in order to complete the design was a great help in specifying and defining my object’s few, however very particular features. The overlaying concept for the knife’s physical manifestation has not necessarily changed but has branched out into a few new, and still related concepts. How can the process of cognitive archaeology refine physical understanding of subconscious imagery predicated on past, future, and present emotional constructs? This guiding question for my research still remains as such, although the entirety of the design and building process has given me a reason to approach the similar question; what does it mean to hold a physical element of a dream, and is there a new relationship established between that element upon an experience of physical interaction? I have made the purpose of this research and object development pertinent to the analysis of self and attachment, presented as entirely personal. The object’s use or “value” is entirely exclusive in relationship to my own needs and questions.

STL

window.onload = function() {
thingiurlbase = “http://blogs.evergreen.edu/rosmaking/wp-content/plugins/stl-viewer/js”;
thingiview = new Thingiview(“default”);
thingiview.loadSTL(“shoe.stl”);
thingiview.setObjectColor(‘#2B56B8’);
thingiview.setBackgroundColor(‘#FFFFFF’);
thingiview.initScene();
}

Rotation: |

Iteration #4, the Fallen Soldier


Rotation: |

Material use: 2 grams

Print time: about 10 minutes, standard settings

x = 20mm; y = 20mm; z = 24.43mm

Throughout my research and experiments I have had a great deal of learning experience. In the process of capturing a few different objects, I slowly became less optimistic about the fate of my 3-D scan platform. It now seems that it is too difficult to capture the necessary detail of most objects for them to have any practical use. Objects such as boxes or anything with a mainly flat, matte surface can be scanned fairly precisely. However, objects such as the little toy soldier or glasses frames have too much empty space and/or gloss for an accurate model to be made. With these restrictions on what could accurately be scanned with the hardware I have , how could anything practical even be made?

In addition to the rough, distorted models that I scanned, their conversion process into a printable format also proved to be harder than I originally anticipated. Every detail that was assembled imperfectly in the 3-D model looked incrementally worse with each conversion step until finally stripped of its native color and sent to the print bed. For the purpose that I originally intended, my project had hit a brick wall. Not only were the models mangled nearly beyond recognition, but the polygonal intricacies make for a very slow print. Basically, my idea of a quick, easy scan followed by a painless touch-up and print has been proven to be a pipe dream, at least with a standard camera and 123D software. I did find the whole project to be a learning experience, and would definitely like to continue studying what is happening in the forefront of 3-D scanning technology. Now knowing that we have access to multiple XBOX Kinect units, I would like to either direct my efforts towards that or the construction of a DAVID 3D Laser scanner, something I initially heard of in Fabricated.

Connor Donovan's Portfolio 2014-12-01 11:58:49

window.onload = function() {
thingiurlbase = “http://blogs.evergreen.edu/doncon26/wp-content/plugins/stl-viewer/js”;
thingiview = new Thingiview(“default”);
thingiview.loadSTL(“shiny_allis.stl”);
thingiview.setObjectColor(‘#333399’);
thingiview.setBackgroundColor(‘#FFFFFF’);
thingiview.initScene();
}

Rotation: |

« Older posts Newer posts »