Tech Teaching Tips from Timothy | December 2023
Timothy Corvidae (he/him), Instructional Designer at the Washington Center, brings a range of experience in curriculum design, instruction, and facilitation. Check out his full bio on our website and connect for further conversations on online teaching at Evergreen.
Engaging Formats for Student Introductions
As the quarter ends we might not be feeling quite ready to think about how to kick off the next one, but . . . this tip is tailored for week 1, so here it is.
Just about every guide you’ll ever read about fostering community online will recommend having students post introductions to themselves in the first week, or even in “week zero” before the term begins. This works just about any way you do it, but it can be more fun–and students may be more likely to really give each other’s posts their due–if they can do it in a format that is inherently engaging.
These introductions can also serve to get students relating to themes in your program or course. I like to pose a few prompts for their introduction, at least one asking for a personal connection to a theme you’ll be studying, and at least one that is an invitation to just share about themselves as a human, not a student.
Here are three formats that can work with whatever prompts you choose:
Photo from your Phone: Have students select a photo from their phone’s photo gallery to share that says something about what they value/what delights them in the world/something or someone that sustains and uplifts them/ [insert prompt here]. They should add alternative text describing the photo in their post, in case someone in the class has a visual impairment. Make it clear that this must be a photo they already have, because this is a reflection activity for them as well as an act of representation (Maybe suggest that camera photos or photos stored on a computer are also allowed, in the event a student doesn’t have a phone with a camera). Have them write about the photo with their post–either a free-form explanation or you can provide some thoughtful prompts. Then, encourage students to ask each other questions or name connections they notice between people’s photos and themes.
Variation: Take a selfie of yourself wherever you are right now/where you usually study/where you usually log in for zoom class. This is about weaving together a physical learning community composed of the physical environments everyone.
Use flip (formerly known as flip grid) for intro videos:
(Most) students love flip grid. And it’s an app within Microsoft 365, so it gets students into that environment.
The key is to ask students to limit the length of their videos. The goal here is for students to be able to enjoy watching all or most of each other’s videos, so short is sweet. I recommend 90 seconds to 2 minutes max; maybe even challenge them to 1 minute. You can actually enforce this when you set up a grid, by setting a time limit for their recording.
Drawback: Some students aren’t thrilled about making a video of themselves, and for some of them this might not be something they can or will do. You can address this by offering the option of turning the camera around, and making a walking video of a place they love, or someplace they’ve been meaning to explore, or [insert prompt here]. You could even have ALL the students do this.
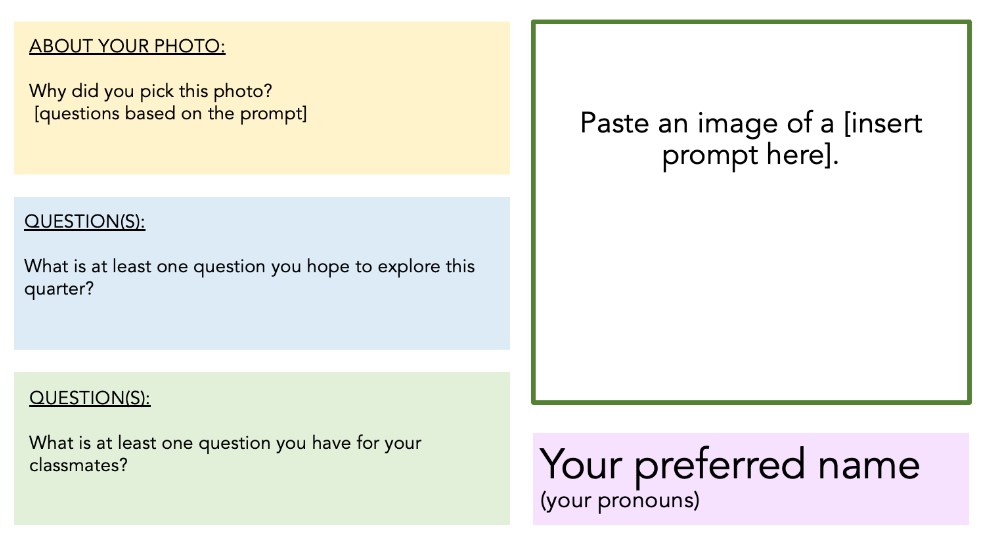
Use a shared slide deck with a slide template: This is a current favorite of mine, for many kinds of assignments. Think about what you want students to share in their introduction, and set up a nice slide template in which they can do that. Create a slide deck in powerpoint with enough copies of the template slide for all of your students. You can embed the slide deck in a page on your canvas site (reach out if you’d like a walk-through of this process). Then invite students to grab a slide and complete it. Students can interact with each other’s slides using by adding comments (under the Review menu, they can choose Comment), or but posting comments in the Notes section underneath a slide.
This format works well because students can share a good amount of information that is digestible because it comes in a predictable, visually organized format. It’s fun, because students can see the array of their slides in the side bar, and can flip back and forth through each other’s pages easily. Using it for introductions also gets them used to the format, if you want to use it for other activities later in the quarter (it’s excellent for doing critiques, proposing projects, and so much more!).
Here’s an example slide template:


