
Download, Research, Hand Coloring, and Assembly Instructions.
I. Gather Supplies
- Scissors or Utility Knife and Cutting Mat
- 12-18″ ruler
- Pencil
- Set of 12 Colored Pencils (Prisma Color Brand is best because it has more pigment in each pencil.)
- 2 sheets of legal-size paper — white or ivory works best
- Tablet, Smart Phone or Computer for on-line research
II. Download and Print PDFs
1. Two-sided Black and White Red Flowering Currant Booklet. Click here to download: BWRedFlowerCurrantBookletSide1and2
- Use “scale to fit”, “print entire image” printable area option.
- Center image.
- Print on legal-size paper at highest quality
- choose the two-sided feature on your printer with binding on the short edge or simply feed the printer manually.
- Click Here to Download:


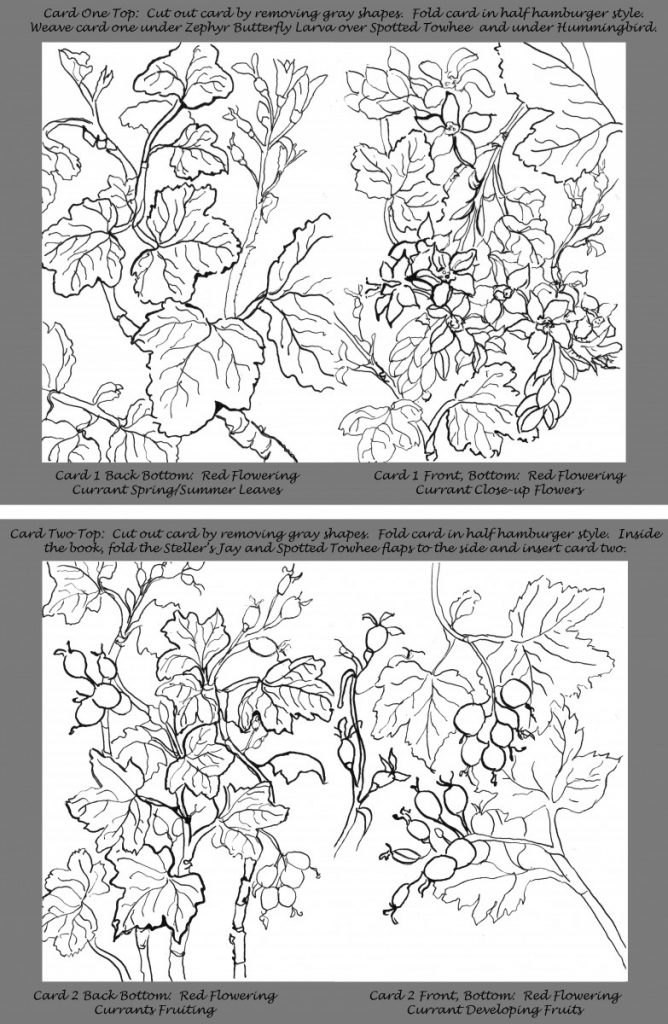
2. Download and Print Out Insert Cards. Click here to download: BWRedFloweringCurrantBothCards
- use one-sided legal sized paper
- print at 100% using highest quality print option.
- don’t use “scale to fit” print option
III. Hand Color the Booklet and Insert Cards If you would prefer to download the instructions, click here: BWBookletRedFlowCurrantInstructions

- Colored Pencils: Prisma Color colored pencils are the best, but other such as Crayola will work. The cheaper brands have less pigment, so it’s hard to build up rich colors. Just get a box of 12 colors. Then you can mix them to create additional colors. Start with the lighter color and add the darker ones on top.
- Plant Image Colors: Notice the images in the booklet and on the cards are organized around seasonal changes such as budding, leafing out, flowering, fruiting and changing leaf color in the fall. Use the Plant Image Library (Click Here) to see what the plant looks like in different seasons. This will help you choose the colors. You can also use additional resource books and websites listed. (Click Here) You can also go outside and observe the plant! just try to match the colors.
- Animal Colors: Use the Animal Image Library (Click Here) to find out the colors of the animals.
IV. Write your own text
- Turn the booklet page over and find the research questions.

2. Use the Plant Image Library (Click Here) or Plant/Animal Field Guides and Websites to answer the questions. Write your own answers in the booklet.
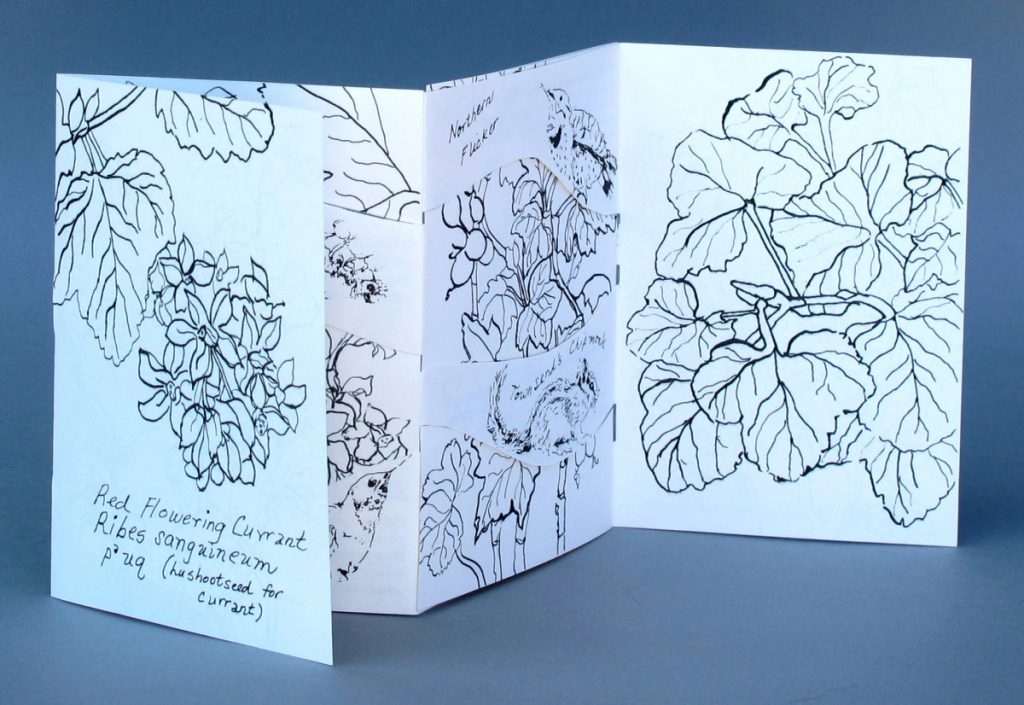
V. Assemble the book that you hand-colored.
1. Trim 1/8″ along the short edges of the page. (Note that the printer uses this 1/8″ in on each side to feed the paper into the printer.
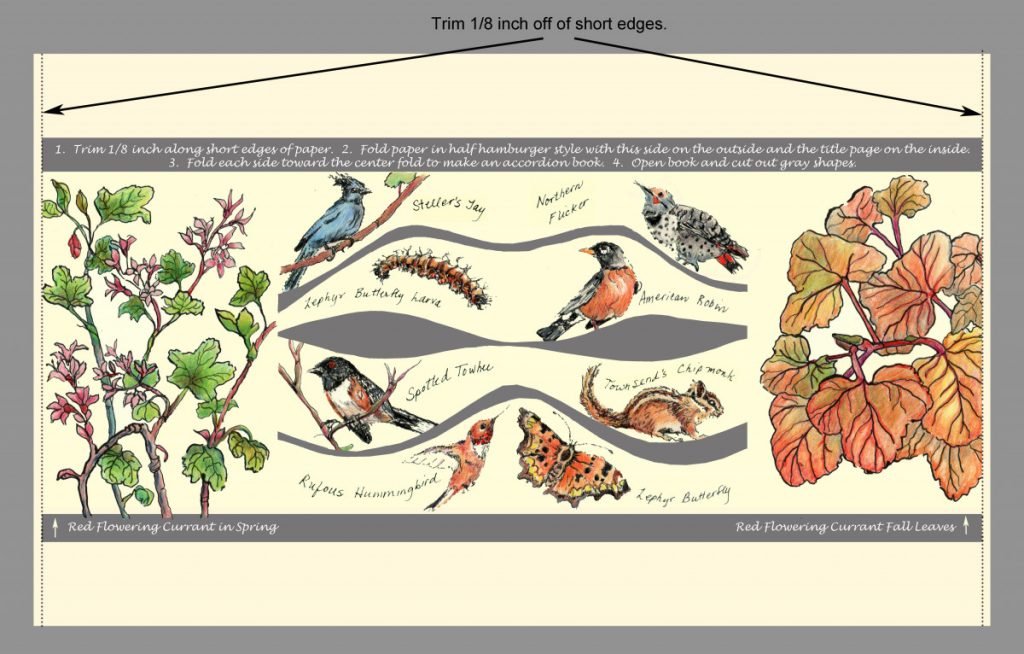
2. Fold paper in half “hamburger-style” with the animal side on the outside and the title page on the inside:

3. Fold the top side toward the center fold.

4. Turn the book over and fold the other edge to the center fold.

5. Unfold Book

6. Cut out the gray shapes with scissors or a utility knife. It will look like this when you have finished cutting out the gray shapes:

7. Refold the accordion booklet so that the title page is on the front.

8. Gather the printout of the two cards that will be inserted into the magic book:

9. Cut out the cards by removing the gray shapes.


10. Fold each card in half “hamburger style.” They will look like this when you have finished folding.


11. Return to the accordion folded booklet shown in step 7. Open it. Weave card 1 over Steller’s Jay, under Zephyr Butterfly Larva, over Spotted Towhee and under Rufous Hummingbird. If it is too difficult to insert the card, you can trim a bit off of the right hand (non-folded) side.

12. Turn the page and fold the Steller’s Jay and Spotted Towhee flaps to the right side. You will see two new slots:

13. Slip Card Two into the two new slots, behind the Steller’s Jay and Spotted Towhee. If this is too difficult, trim a bit off the right hand, non-fold side. It also helps to keep the flaps straight.

14. Turn the page and you will see:
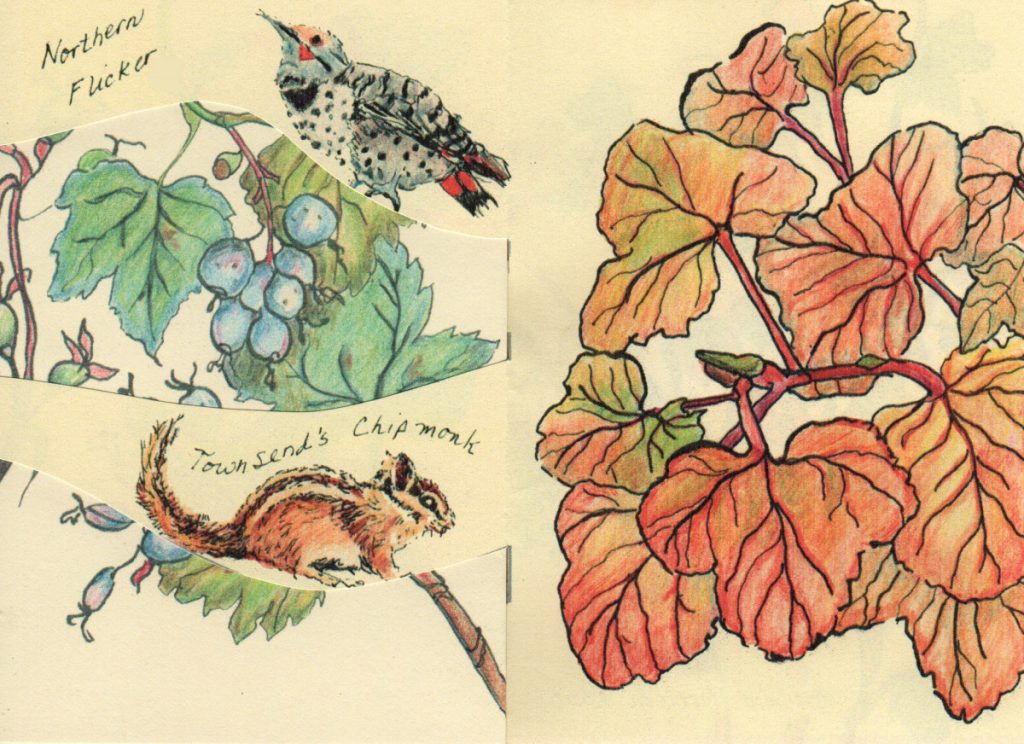
15. Close the booklet so the back cover is facing up:

16. Open the right-hand folded edge to reveal the hidden pocket. This is where the information you have gathered will be displayed. The hidden pocket is unexpected and is why I have called this series, “Magic Books”. To make another book, click here.